Troubleshooting Common Issues with Toilet Sensor Systems
Troubleshooting Common Issues with Toilet Sensor Systems: What are the common faults for squat pan sensors? How to repai
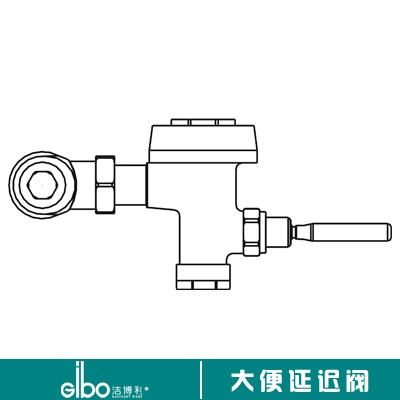
Common Troubleshooting for Sensor Toilets in Construction Projects: What are common faults with squat pan sensors? What are common faults with sensor toilets? What issues occur with sensor squat pans? How to repair sensor flush valves?
If a fault occurs during commissioning or use, first check whether the water supply and power supply (battery) are normal. If confirmed that the issue is not caused by water or power problems, remove the sensor panel and follow the "Common Fault Troubleshooting Checklist" below. Refer to the "Product Exploded View" for component names and positions. If the fault persists after following the checklist steps, cannot be resolved, or the cause remains unknown, please close the angle stop valve of the product first, then contact our after-sales service department to consult on repair methods or request maintenance inspection.
Common Fault Troubleshooting Methods for Construction and Use
◆ (1) Continuous Flow (Troubleshooting Steps)
First, disconnect the power adapter (battery) and the solenoid valve lead connector plug, remove the sensor panel, and shut off the bathroom water supply valve to stop the flow.
(1) Inspect the Solenoid Valve Body Interior
Sand or construction debris jamming the solenoid valve piston causes continuous flow (Illustrated)
a. Use an adjustable wrench to open the "Solenoid Valve Cover" and remove the "Solenoid Valve Piston".
b. Check the valve body for foreign objects such as sand, fibers, or impurities, and clean them out. Gently tap the valve and rinse the solenoid valve body cavity with a small amount of clean water until it is clean.
c. Inspect the removed solenoid valve piston; check the filter screen and rubber diaphragm for dirt, and clean them thoroughly with a soft brush.
d. Reassemble components in reverse order (refer to the Product Exploded View). When installing the "Solenoid Valve Piston", ensure it is placed parallel into the valve body with appropriate force.
e. Finally, reconnect the power adapter (battery) and the solenoid valve lead connector plug, replace the cover, and perform commissioning tests.
(2) Inspect the Solenoid Valve Coil Assembly
The "Solenoid Valve Iron Core" and "Rubber Diaphragm" inside the "Solenoid Valve Coil Assembly" are blocked by sand or mud from construction, causing continuous flow (Illustrated)
a. Use a Phillips screwdriver to loosen the four fixing screws and remove the "Solenoid Valve Coil Head". (Pay attention to the integrity of the solenoid valve assembly parts to prevent loss).
b. Clean the solenoid valve iron core, rubber diaphragm, and valve body seat with clean water.
c. Reassemble the solenoid valve components in reverse order (refer to the Product Exploded View) and secure with screws.
d. Finally, connect the power adapter (battery box) and the solenoid valve lead connector plug, replace the cover, and perform commissioning tests.
(3) Inspect Connectors and Sensor Module
Check if all connector plugs are tight and making good contact, and inspect the sensor window for dirt. (Illustrated)
a. Check if the connection plugs between the product power adapter (battery), solenoid valve, and sensor module are tight and making good contact.
b. Check if the surface of the sensor module window has dirt. If so, wipe it clean with a soft damp cloth and neutral detergent.
◆ (2) No Flush (Troubleshooting Steps) (Illustrated)
(1) Check Water Supply Valve and Flow Adjustment Knob
Check if the inlet pipe valve is open. Check the solenoid valve flow adjustment knob; if it is closed, open the inlet valve and the solenoid valve flow adjustment knob. (Turn the adjustment knob counter-clockwise until the valve is fully open). (Illustrated)
(2) Check Power Supply or Battery
In the event of no flush, if there is no flashing indicator light during use (normally the red indicator flashes once after 3-4 seconds of sensing) or the indicator light flashes continuously, please check or replace the power supply (power adapter or battery).
(3) Check Sensor Module
Check if the sensor module is working properly. In normal operation, when a person enters the sensing range, the indicator light will flash once after about 3-4 seconds, indicating detection. After the person leaves, there is a delay of 3-4 seconds before the sensor performs a normal flush. (Illustrated)
◆(2) Low Flush Volume (Troubleshooting Steps)
(1) Check Water Supply Valve and Flow Adjustment Knob
Check if the water supply pipe valve is fully open. Measure if the water supply pressure is normal (minimum pressure should be greater than 0.14 MPa). Check if the solenoid valve flow adjustment knob is fully open. (Turn the adjustment knob counter-clockwise until the valve is fully open). (Illustrated)
(2) Check Water Supply Pipe and Filtration System for Blockages
Check if the water supply pipes and filtration system are blocked by sand or debris.
(3) Check Solenoid Valve Piston Rubber Diaphragm
Use an adjustable wrench to open the "Solenoid Valve Cover" and remove the "Solenoid Valve Piston". Check if the "Rubber Diaphragm" of the solenoid valve piston is deformed, damaged, cracked, or degraded. If so, replace with a new "Solenoid Valve Piston" to resolve the fault.